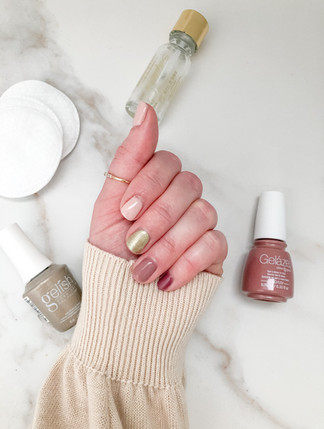
DIY Gel Manicure
- graceandlennon
- Nov 11, 2020
- 3 min read
Doing our nails at home was something born of necessity during the past few months, but Olivia and I decided to run with it. I've never been a person that loves doing my nails with regular polish because they always chip in a couple days or you go to bed with them looking perfect and wake up with every nail smudged. I was really into getting my nails done for awhile, but that obviously adds up quickly when you're getting them every two weeks with gel. I personally was not the biggest fan of dip powder, so learning how to do my own gel nails at home has been perfect. In this post, I wanted to share my tips for DIY gel manicures and what products I have found work best!
For starting out, I highly recommend this top and base coat; this starter set for polish (the sets come in variety of shade ranges) and this UV light. In terms of tools, I recommend just starting out with a buffing block, a file, and a cuticle pusher. When I first started doing my own nails, this was all I used, and my nails always turned out looking good. I have since added an additional item to my routine that is by no means absolutely necessary, but I have noticed it makes application considerably easier. This product helps to clean and dry off the surface of your nail before adding top coat.
Application Process and Tips:
Clean up your cuticles and apply cuticle oil in advance of painting: I'm not sure if there's any truth to this, but I find my application isn't as smooth if I've applied cuticle oil even a couple hours before painting. I try to clean up my cuticles and use cuticle oil the night before I'm going to do my nails, and find this works best
Either lightly buff the surface of your nails or use the pH bond before your top coat. I generally just use the pH bond and find that does a great job of prepping the nail for your base coat
Apply your base coat sparingly: the base tends to be a thicker/sticker consistency and it's easy to pile too much onto your nails, especially if they're short. Wipe any excess product off the brush (the brush holds more than you expect). Also, if you get any base coat onto your skin, wipe it off immediately. The base is the most important step in the process and if its too thick, your nails won't look the best
Cure: once you've applied a thin layer of base coat, you'll need to cure your nails between every additional layer. I tend to cure each coat for 60 seconds, but 30 seconds works fine too and is helpful if I'm in a rush
Apply color to the middle of that nail, not the base: this tip is helpful because it will prevent your polish from looking overly thick and gloopy near the cuticle. Again, it's best to work in thin layers and build up the color. Apply your color to the middle of nail and distribute downward and then sweep up
For the best color pay off, I generally do three thin layers of color. With very light colors, I'll have to do four layers. Don't forget to cure between each layer of color
Apply a thin layer of top coat. Again, applying too much top coat can make your nails look thick and unnatural. Less is definitely more in this process
Cure the top coat and you're good to go!
For this specific manicure I used: Gellen (shade 003) on my thumb and index finger, Gelish (shade "give me gold") on my middle finger, Gelaze (shade "kill the lights") on my ring finger and Gelish (shade "good gossip") on my pinky.


Comments